Quick Start
Introduction
In this tutorial, we will create a prompt in the web UI, publish it to a deployment, integrate it with our code base.
If you want to do this whole process programatically, jump to this guide
1. Create a prompt
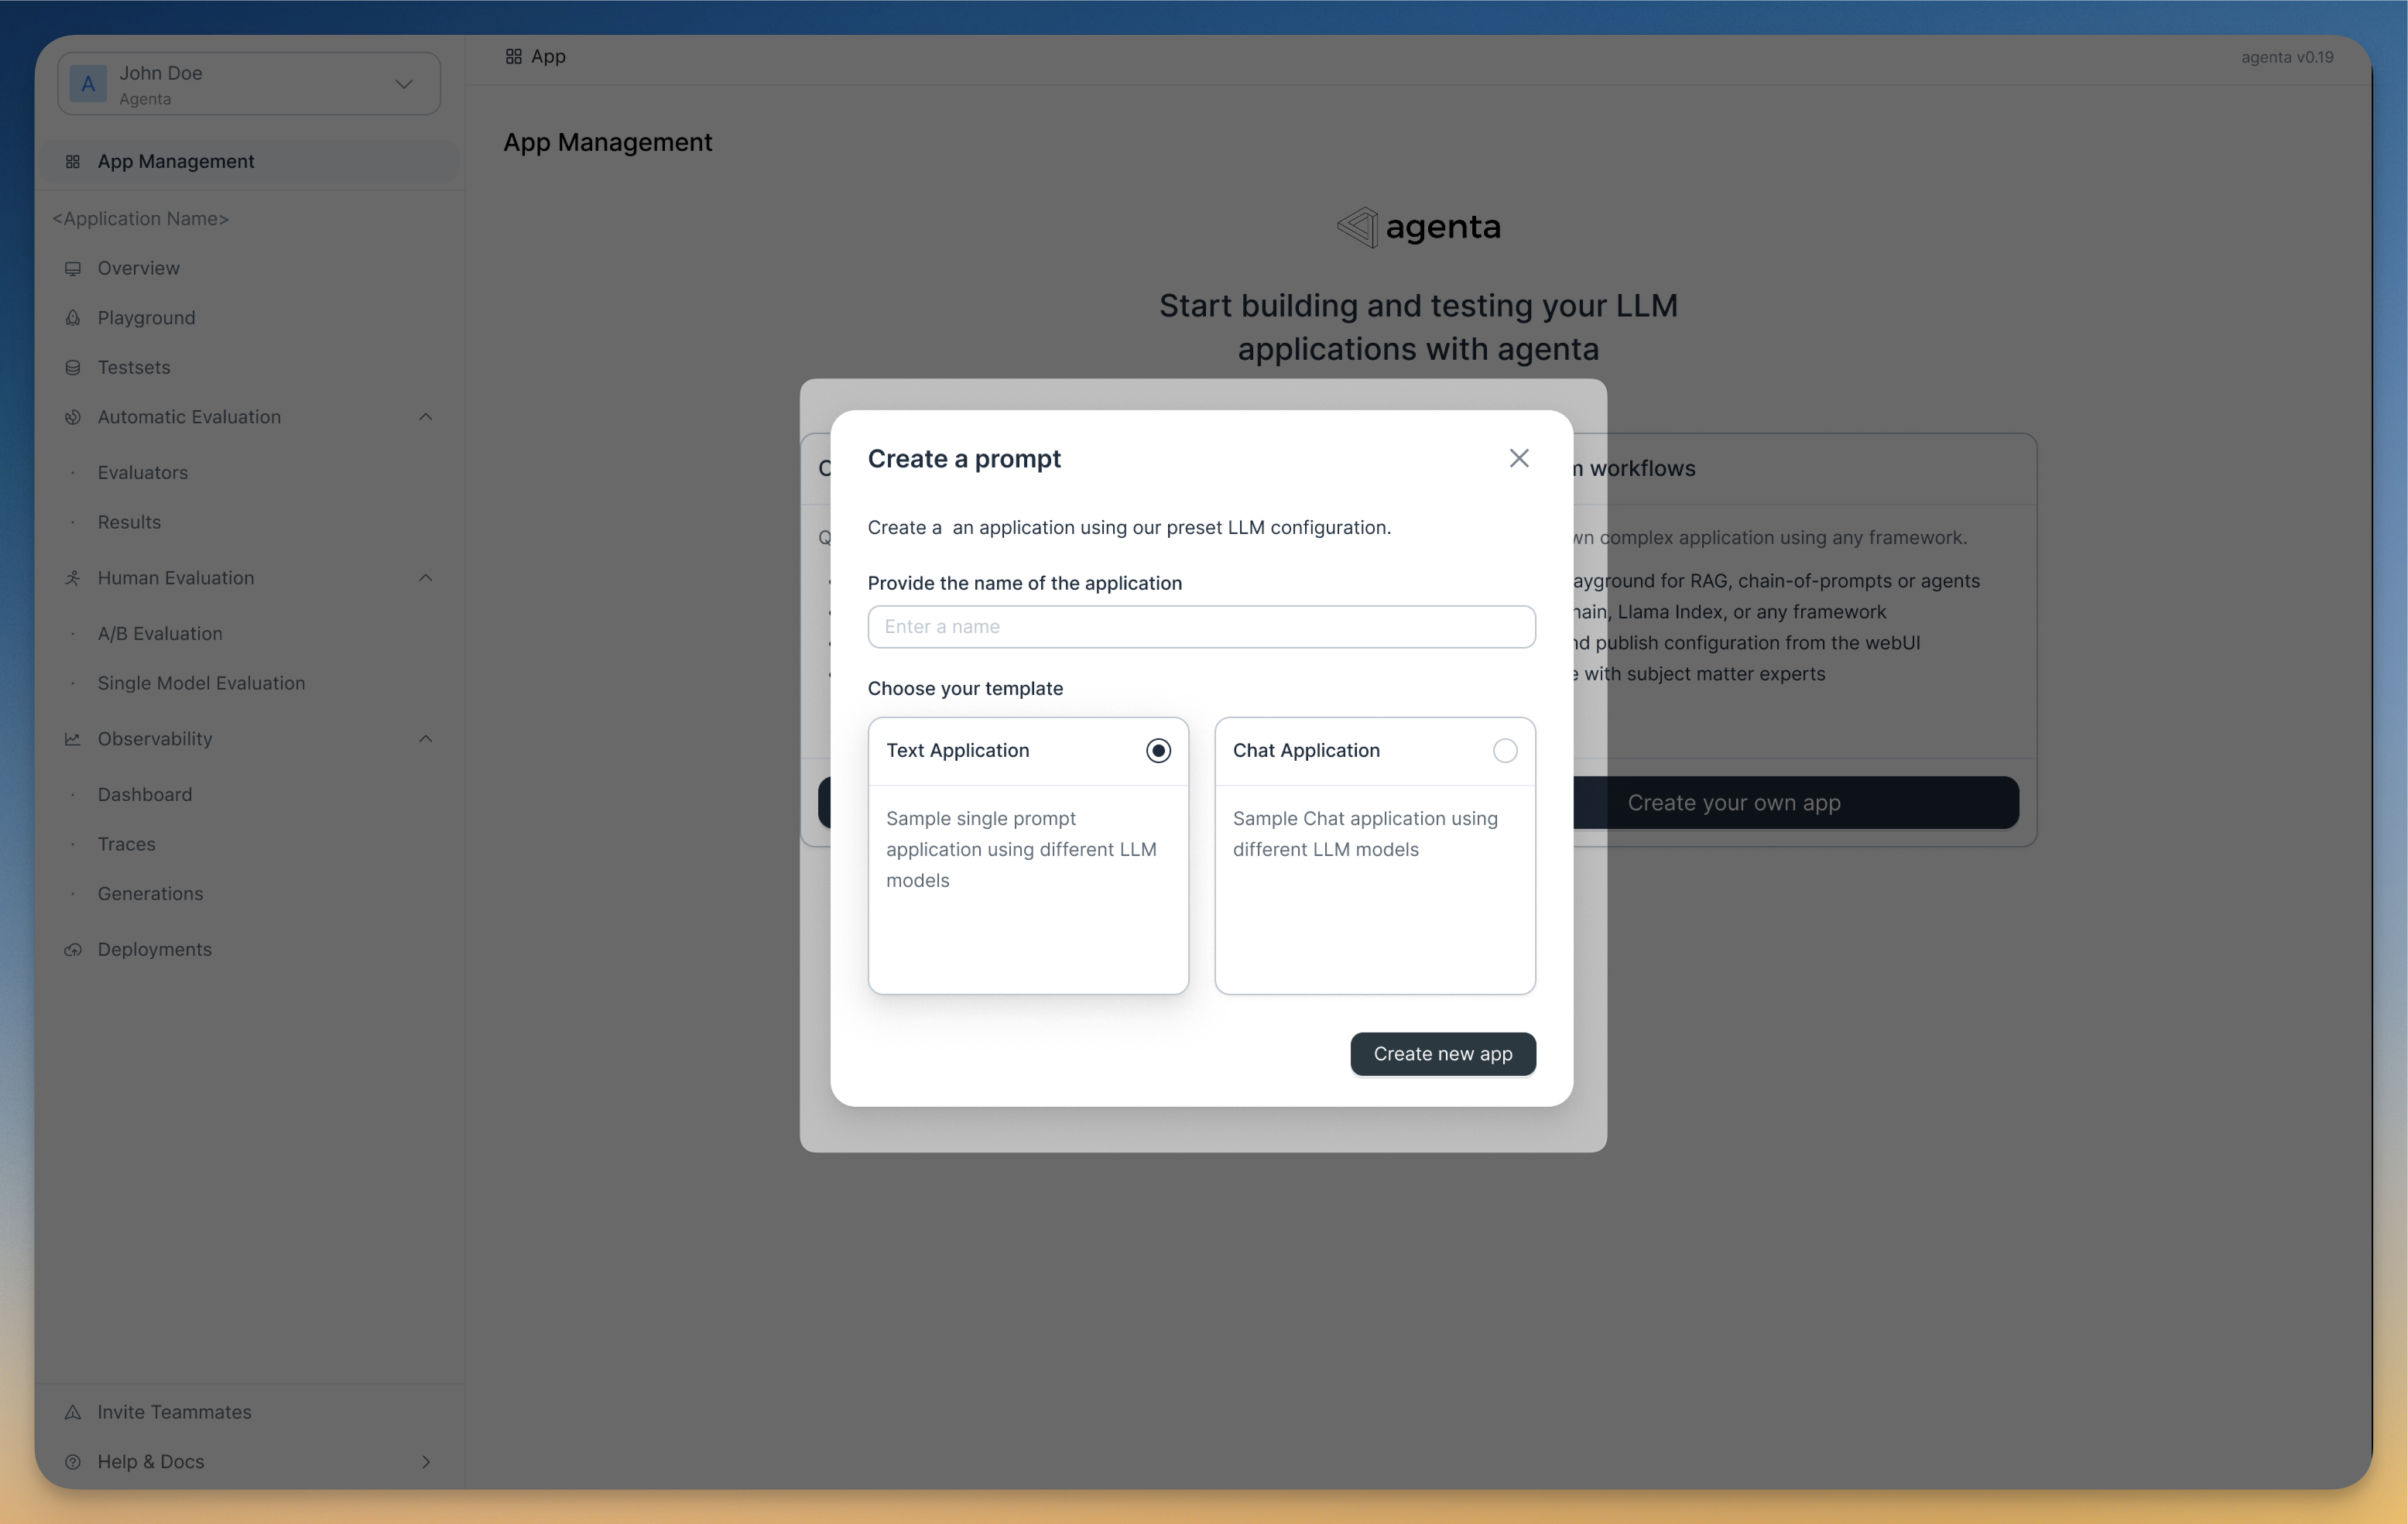
We will create a prompt from the web UI. This can be done simply by going to the app overview, clicking on create a prompt. You have here the choice between using a chat prompt or a text prompt:
- A text prompt is useful for single turn LLM applications such as question answering, text generation, entity extraction, and classification, etc.
- A chat application is designed for multi-turn applications like chatbots.
2. Publish a variant
You can create in each LLM application multiple variants. You can think of variants as git branches. Each variant is versioned with each variant version having it's own commit number and being immutable.
When you are satified with a commit (after evaluating it for instance) you can publish it to a deployment. The deployment is tagged with an environment (production, development or staging) and provides you access to endpoint for both the published configuration and to a proxy for the calls.
To publish a variant, go to overview, click on the three dots on the variant that you want to publish and select Deploy (see screenshto)
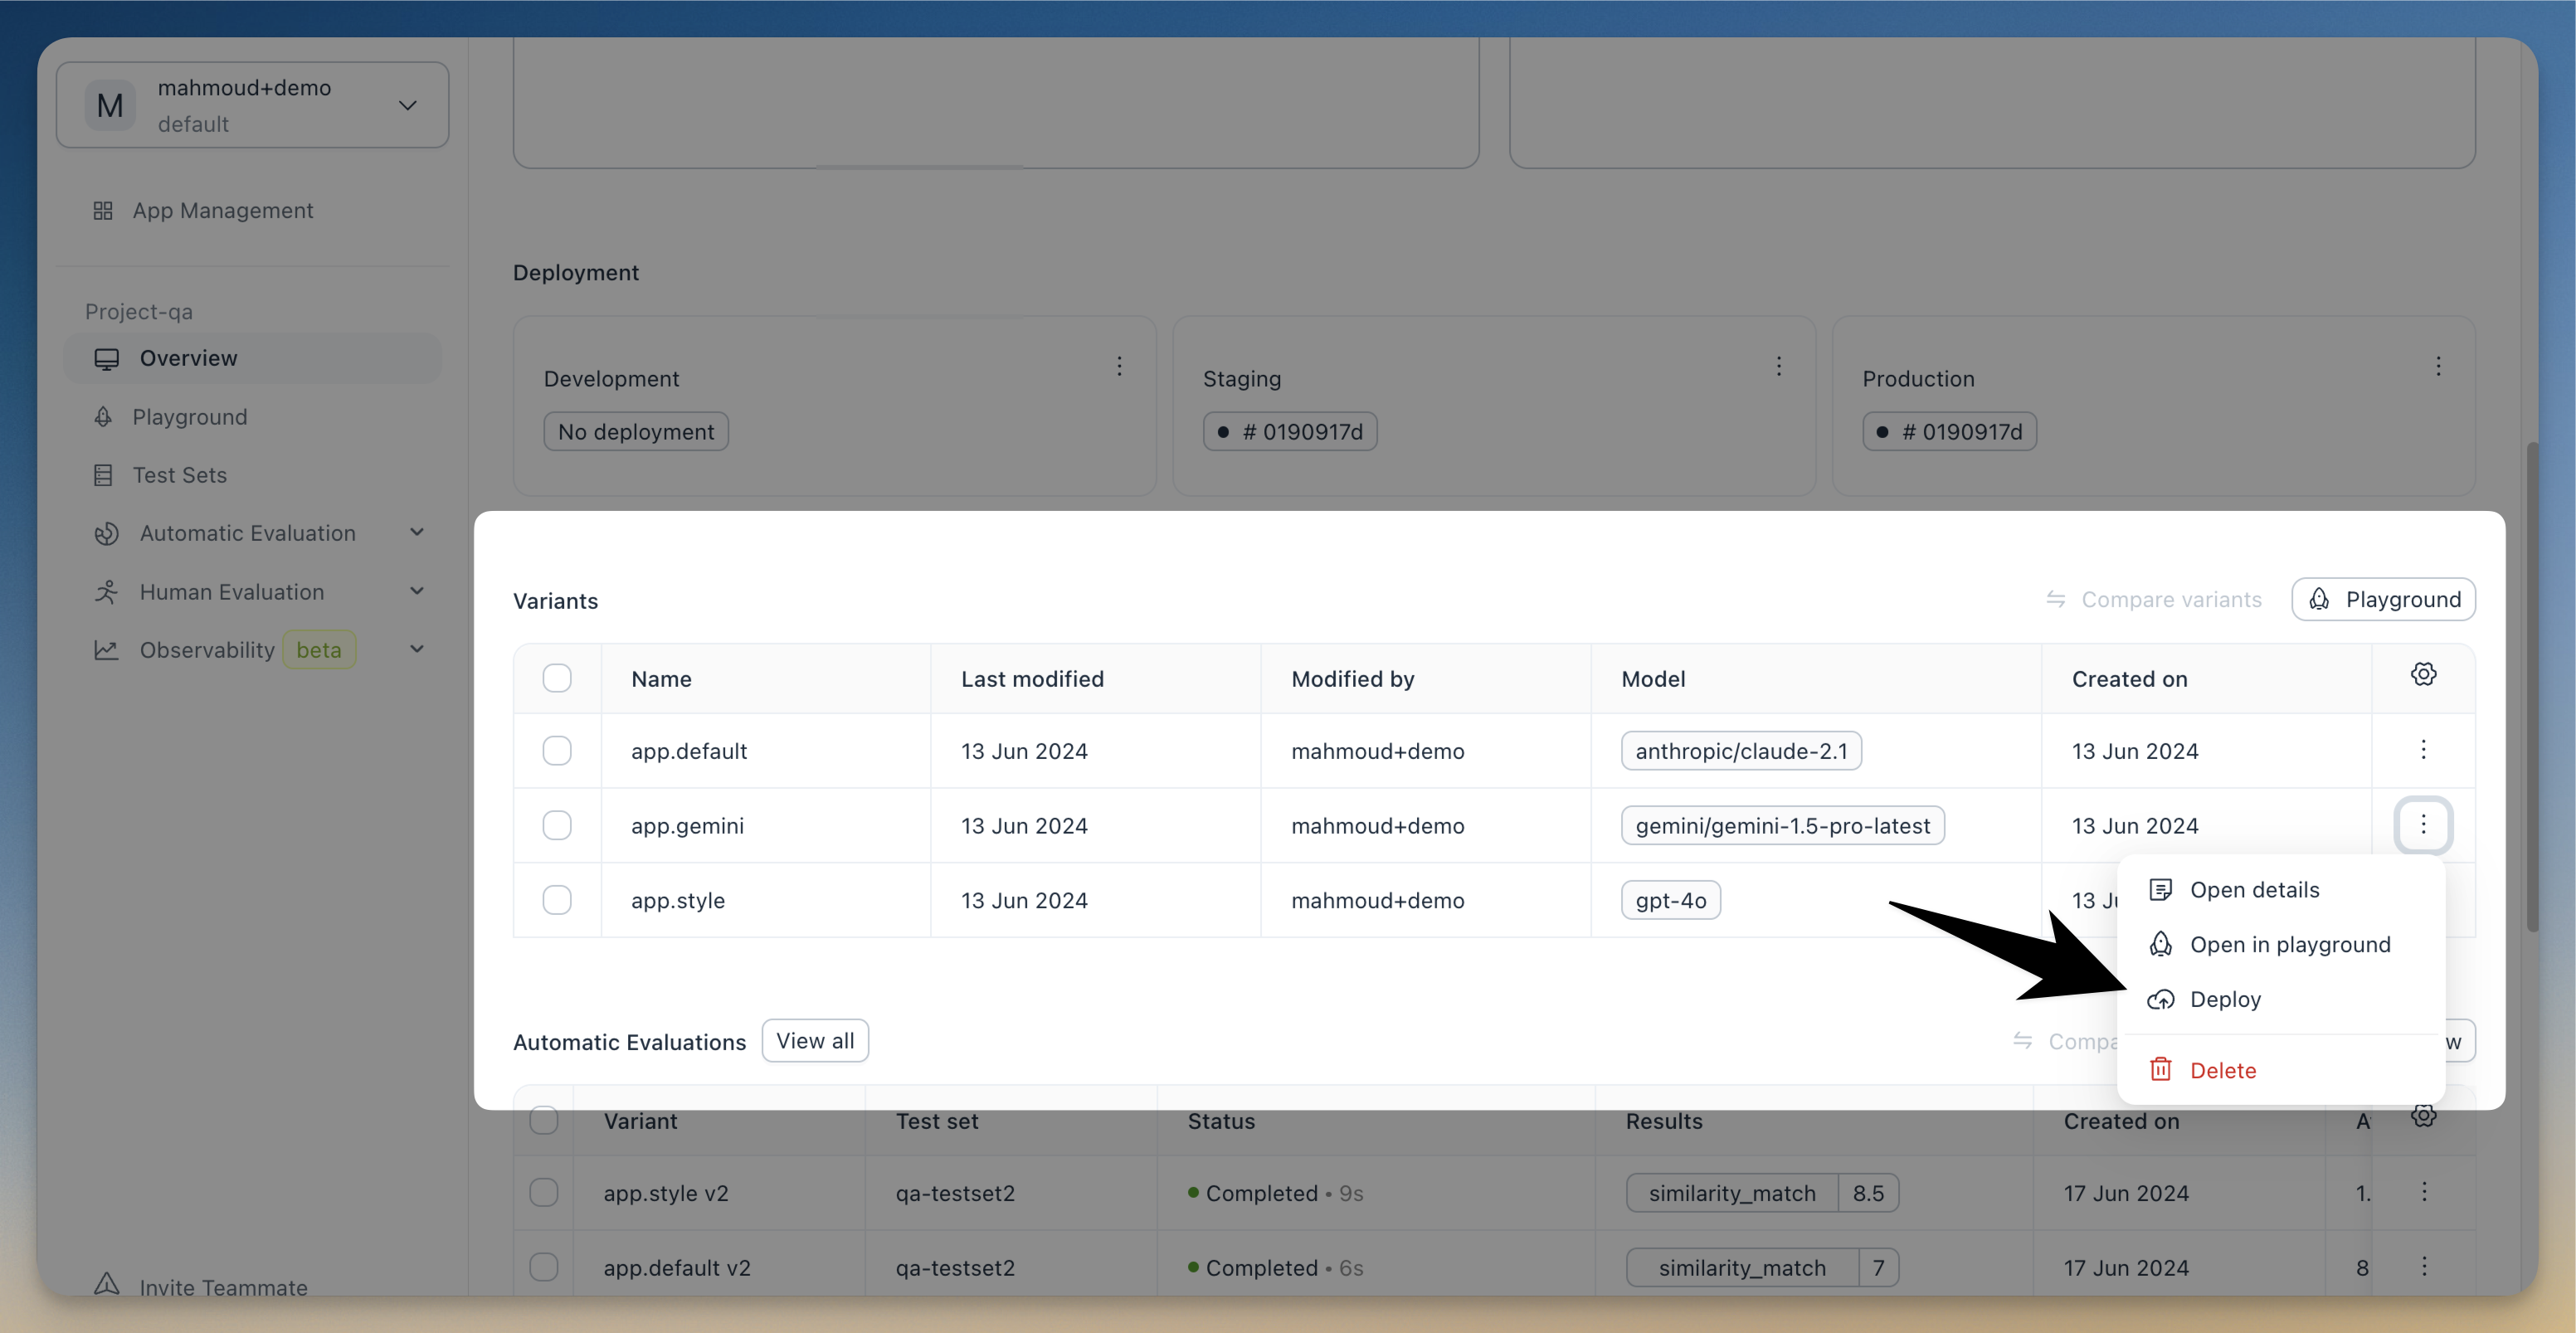
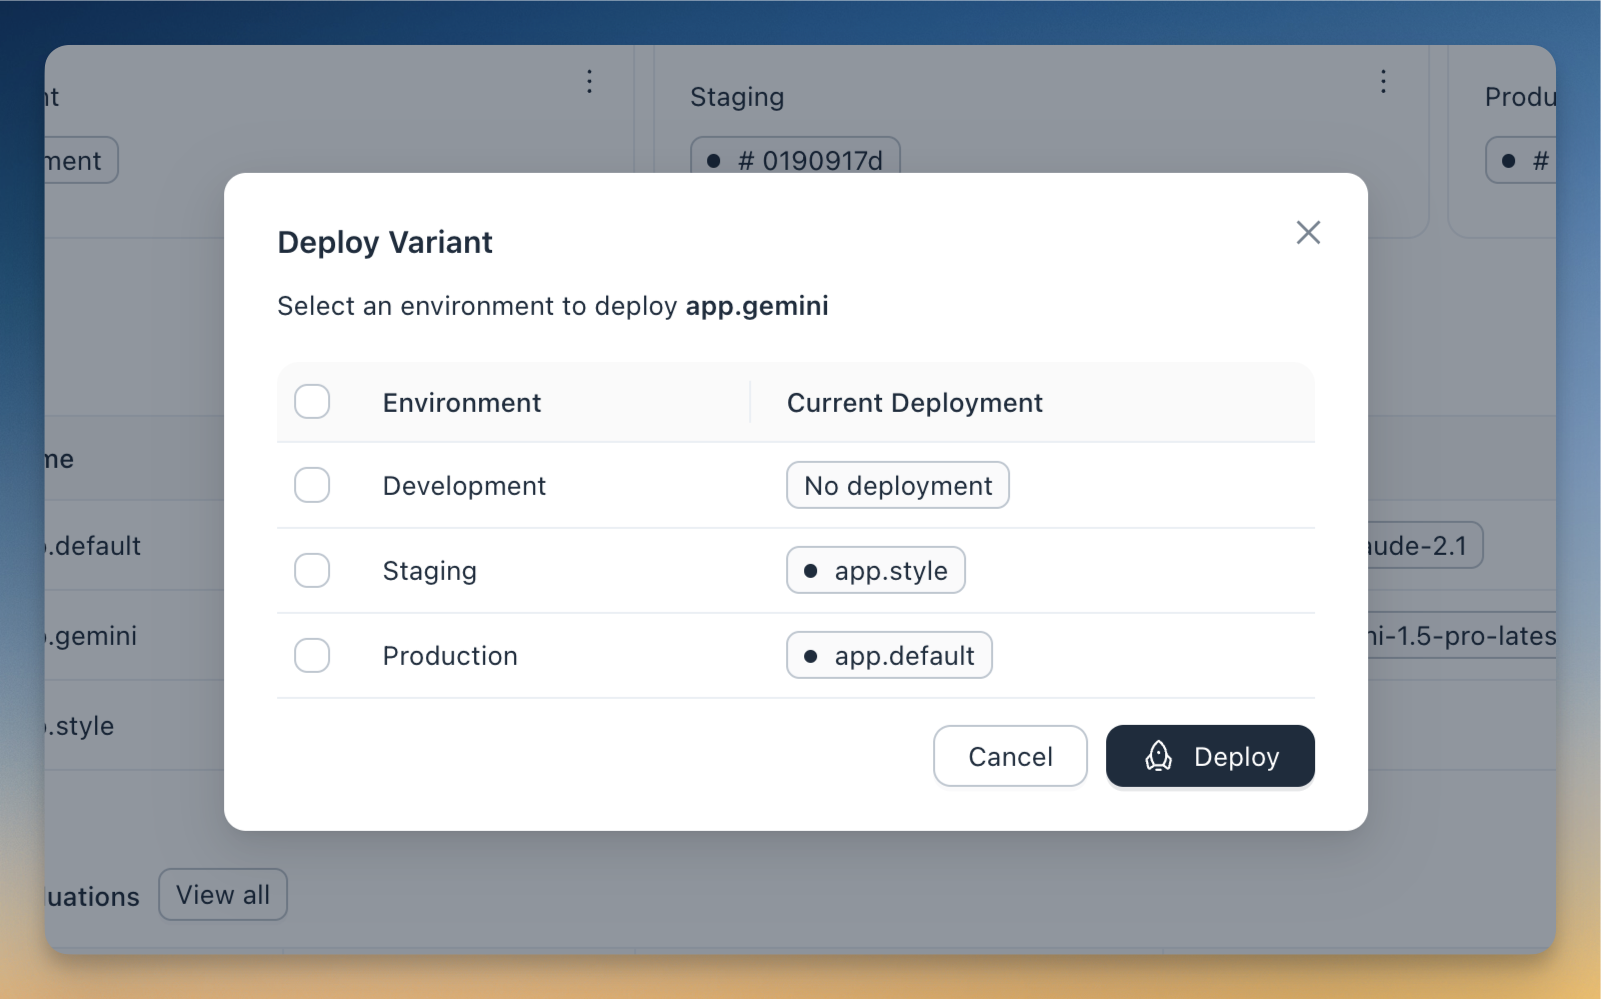
You can select now which deployments you want to publish the variant to
New change to the variant will not be automaticly published to the deployment unless we explicitly publish it.
The reason is that we have published the last version/commit of the variant to that deployment and not the variant itself!
3. Integrate with your code
To see the code snippet needed to use the prompt, click on the name of the deployment and you will see a drawer with the integration code. For example for python
import agenta as ag
from agenta import DeploymentManager, PromptManager

# os.environment["AGENTA_API_KEY"] = "ag-xxx"
# os.environment["AGENTA_PROJECT_ID] = "ag-xxx"
ag.init()

# fetch the deployment (id)
deployment = DeploymentManager.get_deployment_by_name(deployment_name="production",
                                                      app_slug="my-app")
# fetch latest configuration deployed here
prompt_obj = PromptManager.get_from_registry(deployment_id=deployment.id)
The prompt object will have both the information about the configuration version and the data (under the field data)
{
 variant_slug: "my-variant",
 app_slug: "my-app""
 version: 3,
 commit-id: "afae3232",
 data: {
    'temperature': 1.0,
    'model': 'gpt-3.5-turbo',
    'max_tokens': -1,
    'prompt_system': 'You are an expert in geography.',
    'prompt_user': 'What is the capital of {country}?',
    'top_p': 1.0,
    'frequence_penalty': 0.0,
    'presence_penalty': 0.0,
    'force_json': 0
}
4. Revert to previous deployment (optional)
This feature is only available in cloud and enterprise version
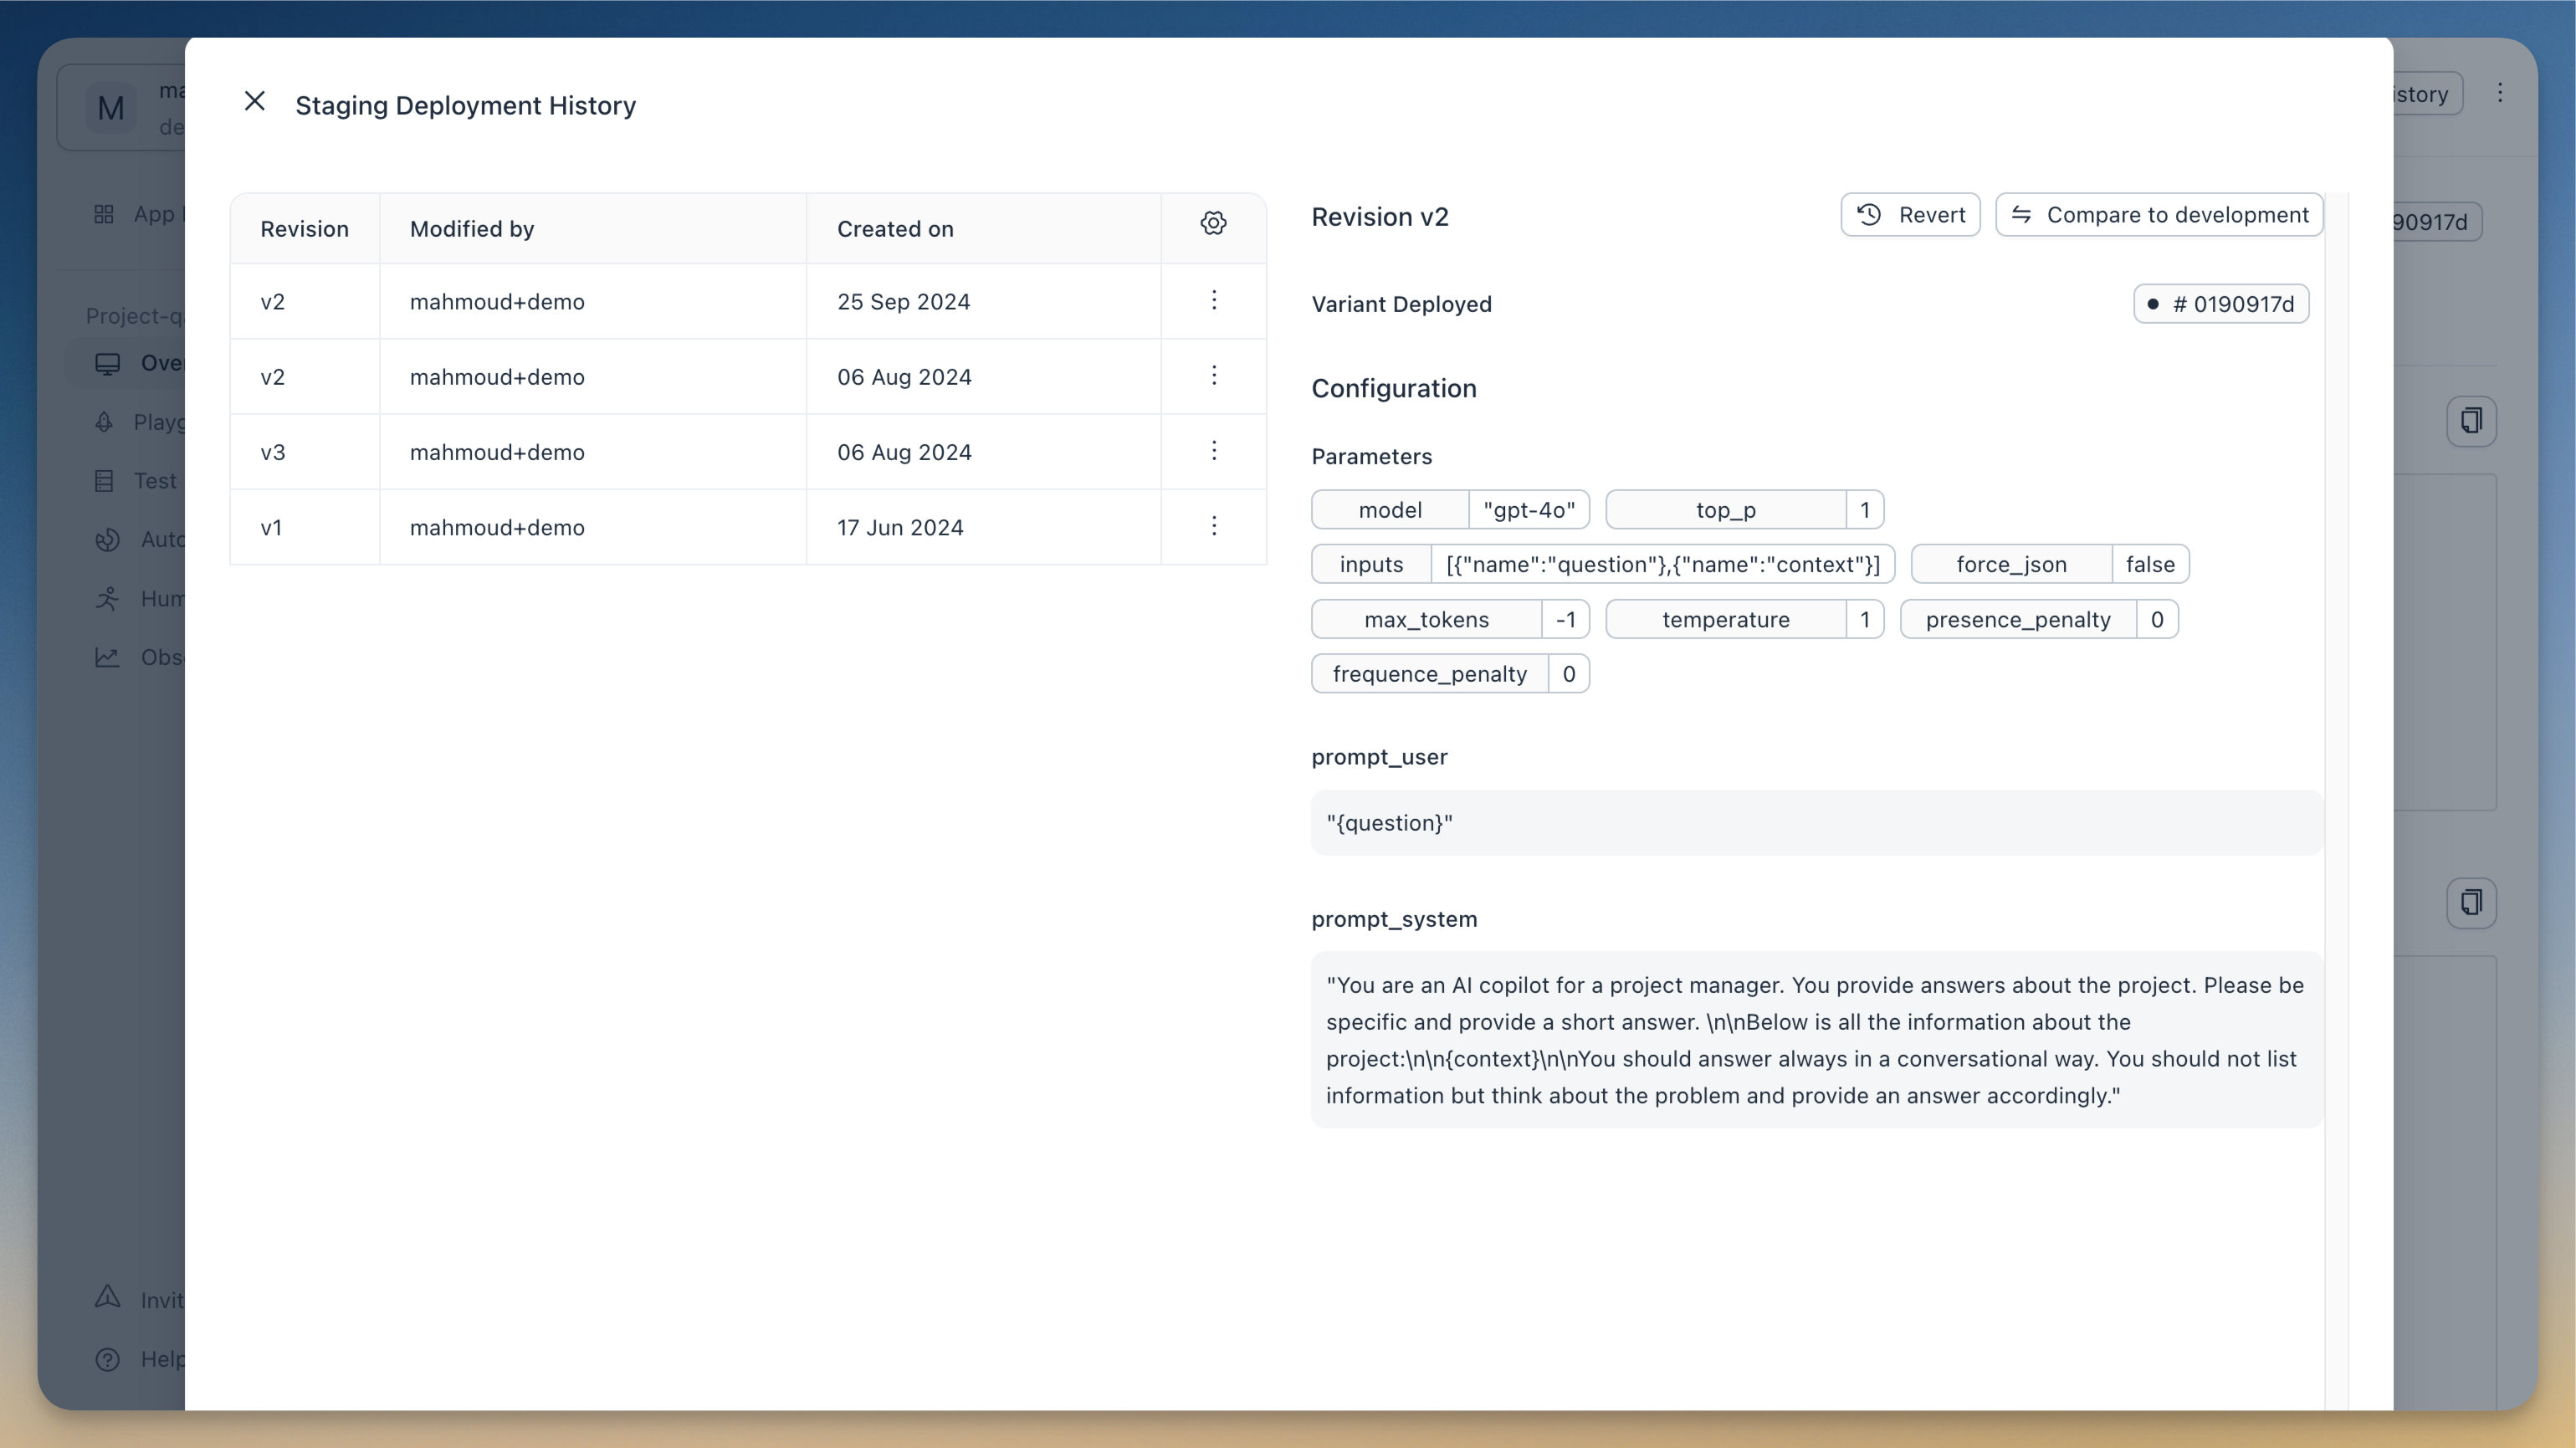
Optionally you would like to revert to a previously published commit. For this click on the deployment in the overview view, then click on history, you will see all the previous published version. You can revert to a previous version by clicking on revert.
Next steps
Now that you've created and published your first prompt, you can learn how to do prompt engineering in the playground or dive deeper into the capabilities of the prompt management SDK